Written by UConn Dietetics student Ariana Morasutti
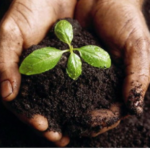
Starting your seedlings inside the home is a great option if you are new to gardening or just want to give your plants a head start. You can start a wide variety of vegetables inside your home such as broccoli, cabbage, tomatoes, peppers and onions. Starting the growth process inside increases your yield because the small plants will be established before you transfer to your larger outdoor pots or plots, meaning you may be able to enjoy your delicious crops earlier! Outdoor gardening depends a bit on Mother Nature too: good rains and warm sun. Keep in mind that not all plants should be started inside. Read the labeling on the seed bags or consult the expert at your local garden center to determine which seeds can begin indoors!
 To start, you will need a seedling tray, seed starting mix, and seeds. Think about how many different vegetables you want to grow, and how many your outdoor garden can accommodate. Plants do grow and spread! If you only have room for a few plants outside, that’s OK! Start with a few and get the hang of the growing process to decide if you’d like to expand next year. Once you determine the variety and number of plants you would like to grow, purchase a seedling tray that can accommodate that amount. The seedling trays will have draining holes so you will want to place the tray on something that can collect the water. Once you have your materials together, you are ready to start your indoor garden!
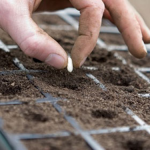
 Fill your seedling starter tray with seed starting mix.
- Poke a hole in the center of each cell.
- Add 2 seeds to each hole.
- Gently cover with a thin layer of seed starting mix.
- Water the cells until moist and place the tray in front of a window.
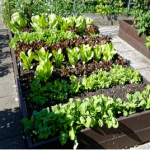
- Move outside after the last frost2.
- Continue to care for your plants outside and watch them grow!
 Fill your seedling starter tray with seed starting mix.
Here are some pro tips for first timers!
- If this is your first time gardening, start small! Once you get the hang of it, you can always add more plants to your outdoor garden later on!
- It is important to purchase a seed starting mix that is fresh, sterile, and light2! This will prevent your seeds from diseases and rot. You want to choose a fluffy, light mix so that the roots can easily push through to the surface when it is time2!
- Aluminum foil trays (and their covers) are great to use as holders to catch the water from the seedling trays! Make sure you wash them thoroughly afterwards if you are planning to use them again for food items!
- Place seedling trays in a south facing window that gets plenty of light throughout the day1!
- Check your seedlings! Make sure the soil is moist and turn your tray so that each plant grows straight2, instead of towards the outside. You will also get great pleasure in seeing how quickly your seeds grow!
- Introduce your plants to the outside slowly after the last frost! Try putting your tray outside for an hour or so the first day in shade3. Gradually increase their time outside by an hour each for a week3. Then they will be adjusted to the outdoors and you are ready to plant in your outdoor garden3!
 It is important to purchase a seed starting mix that is fresh, sterile, and light2! This will prevent your seeds from diseases and rot. You want to choose a fluffy, light mix so that the roots can easily push through to the surface when it is time2!
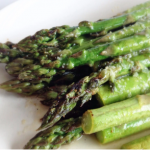
Try this simple and delicious spring asparagus recipe!
 Ingredients:
1 ½ tbsp olive oil
1 pound fresh asparagus, trimmed
3 cloves fresh garlic or 1 tsp garlic powder
½ tsp salt
⅛ tsp pepper
Directions:
- Heat olive oil in a skillet over medium heat. Add garlic and cook until fragrant. Do not burn.
- Add asparagus, salt, and pepper and cook until desired tenderness is reached, about 5-10 minutes
References:
- https://homegarden.cahnr.uconn.edu/seed-starting/
- https://joegardener.com/podcast/037-starting-seeds-indoors-pt-1/
- https://www.homedepot.com/c/ai/how-to-start-your-garden-with-seeds/9ba683603be9fa5395fab90695ad042
This material is funded by UDSA’s Supplemental Nutrition Assistance Program (SNAP).
This institution is an equal opportunity employer.